
This Double Pie Crust Recipe is enough for 2 pie crusts on top and a bottom crust for 1 pie.
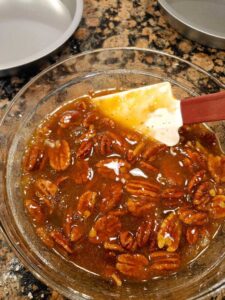
This crust works well with most pie fillings that require a flaky pie crust. It can be used for prebaked crusts for fillings that don’t need to be cooked. It also can be used for pies with fillings that bake at the same time the crust bakes. Like with this pecan pie recipe.

Pie Dough
Equipment
- Rolling Pin
- 2 pie tins
Ingredients
Ingredients:
- 2 ½ cups All-purpose flour
- 3 tbsp. Sugar
- 1 tsp. Salt
- 1 cup cold unsalted butter grated
- 8- 12 TBSP Cold water
Instructions
Directions:
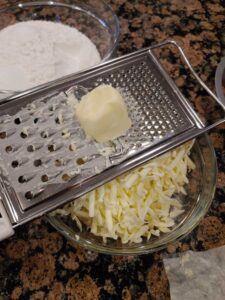
- Grate the frozen butter.

- In a large mixing bowl measure the flour, sugar, and salt. Add in the cold grated butter and fluff with a fork till the butter is in pea-sized pieces (it will look crumbly still)
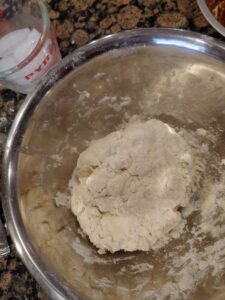
- Add the cold water in a few tablespoons at a time till a dough forms.
- Remove the dough from the bowl and knead lightly until a nice ball forms. Cut dough in half, wrap tightly with plastic wrap, and refrigerate for at least one hour.
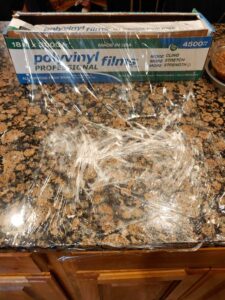
- Thoroughly clean and dry your countertops.
- Lightly dust with extra flour. (Sometimes I will lay down a large piece of plastic wrap before doing this to make clean up a little easier.)
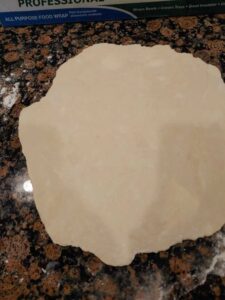
- Roll the dough starting from the center outwards. Pick up the dough in between rolls and rotate. This ensures there is no sticking to the countertop and will help you roll a rounder pie dough. If it is sticking slightly add a dust of flour and continue until the dough is large enough for the desired pie tin.
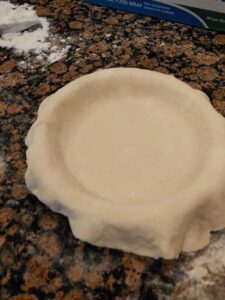
- Flip the tin over on top of the dough to measure. It's best to have a few inches of overhang.
- Carefully using your hands and the rolling pin, pick up the dough and place it in the pie tin.
- Gently lift the overhang as you press the dough to fit into the corner edge of the pans. This will help prevent tearing.
- Trim or crimp the edges to the desired design.
- Fill with desired fillings and Bake!
- Baking time will vary depending on fillings.


Mastering the Flaky Art of Double Pie Crust
There’s something incredibly comforting about the aroma of a freshly baked pie wafting through the air. If you’ve ever wondered how to achieve that perfect double pie crust – one that’s golden, buttery, and flaky beyond belief – you’re in for a treat. In this guide, we’re breaking down the process into simple steps, so you can confidently bake pies that taste as good as they look. Let’s dive into the world of pastry magic!
Tips for Pie-Making Success
- Keep your ingredients chilly – cold butter and water are your flakiness allies.
- Don’t overwork the dough – think gentle, not vigorous.
- Rolling between parchment paper prevents sticky situations.
- Make your crust shine with an egg wash before baking.
FAQs about Double Pie Crust Recipe
Q: Can I use salted butter instead of unsalted?
A: Absolutely! Just adjust the salt in your recipe.
Q: How thin should I roll the dough?
A: Aim for about 1/8 inch for ideal results.
Q: Can I prepare the dough in advance?
A: Yes, wrap it up and chill it for up to a day before rolling.
Q: My crust isn’t flaky – what went wrong?
A: Overworking or excess water might be the culprits. Go easy on both.
Q: Can I freeze leftover dough?
A: Yes, wrap it up tight and freeze it for future pie adventures.
Q: How do I prevent a soggy bottom crust?
A: Consider blind baking – prebake the crust before filling.
Congratulations
You’ve just unlocked the art of crafting a double pie crust that’s both visually stunning and incredibly scrumptious. With these step-by-step instructions and handy tips, you’re now equipped to create pies that will have your friends and family singing your culinary praises. So, tie on that apron, dust your counter with flour, and let the baking magic begin!


